Let’s Learn what is Git and GitHub:#
Git#
Git is a Version control system, it is basically a tool that helps a developer track changes in their code or file and manage different versions of a project. It allows the developer to safely experiment with the code, collaborate with others and backup your work in cloud
GitHub:#
GitHub is an online platform that hosts Git repositories, allowing developers to store , share and collaborate on projects in the cloud. It makes it easy to work with others, and track changes overtime.
Step 1: Installation of Git:#
First you need to Install Git Through CLI , but before that you need to update your system. Use the given command to update your system.
sudo apt updateNow, Install the Git using terminal by using the command given below
sudo apt install gitYou have installed Git but to confirm it’s installation use this command.
git --versionIf there is a output shown like this given below then you have successfully installed git.

Step 2: Configure Git#
Configuring Git means setting up your and preferences so Git knows:
Who is making changes (for commit history),
How to handle new projects
How to connect to GitHub or other remotes
So first set your name by the given command.
Now, enter your email and username in inverted commas as given below.
git config --global user.name "Your userName"git config --global user.email "your@email.com"Output:
After that you can check your git configurations that are currently set on your system. Run the given command in your terminal.
git config --listOutput:
Step 3: Sign in to GitHub#
Create your GitHub account at by simply sign in our sign up your account in the browser
Step 4: Make a File of code#
I am writing the code on text editor you can use VS code or any other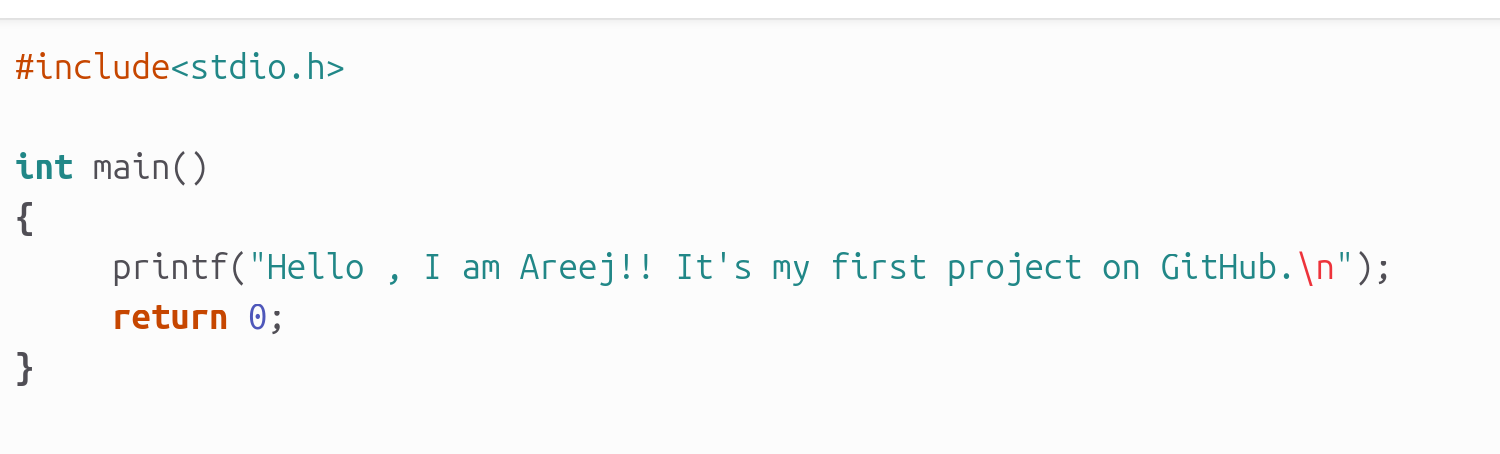
Step 5: Creating a repository on Github:#
Open your Github account and click on the new repository. I am naming it my-first-code.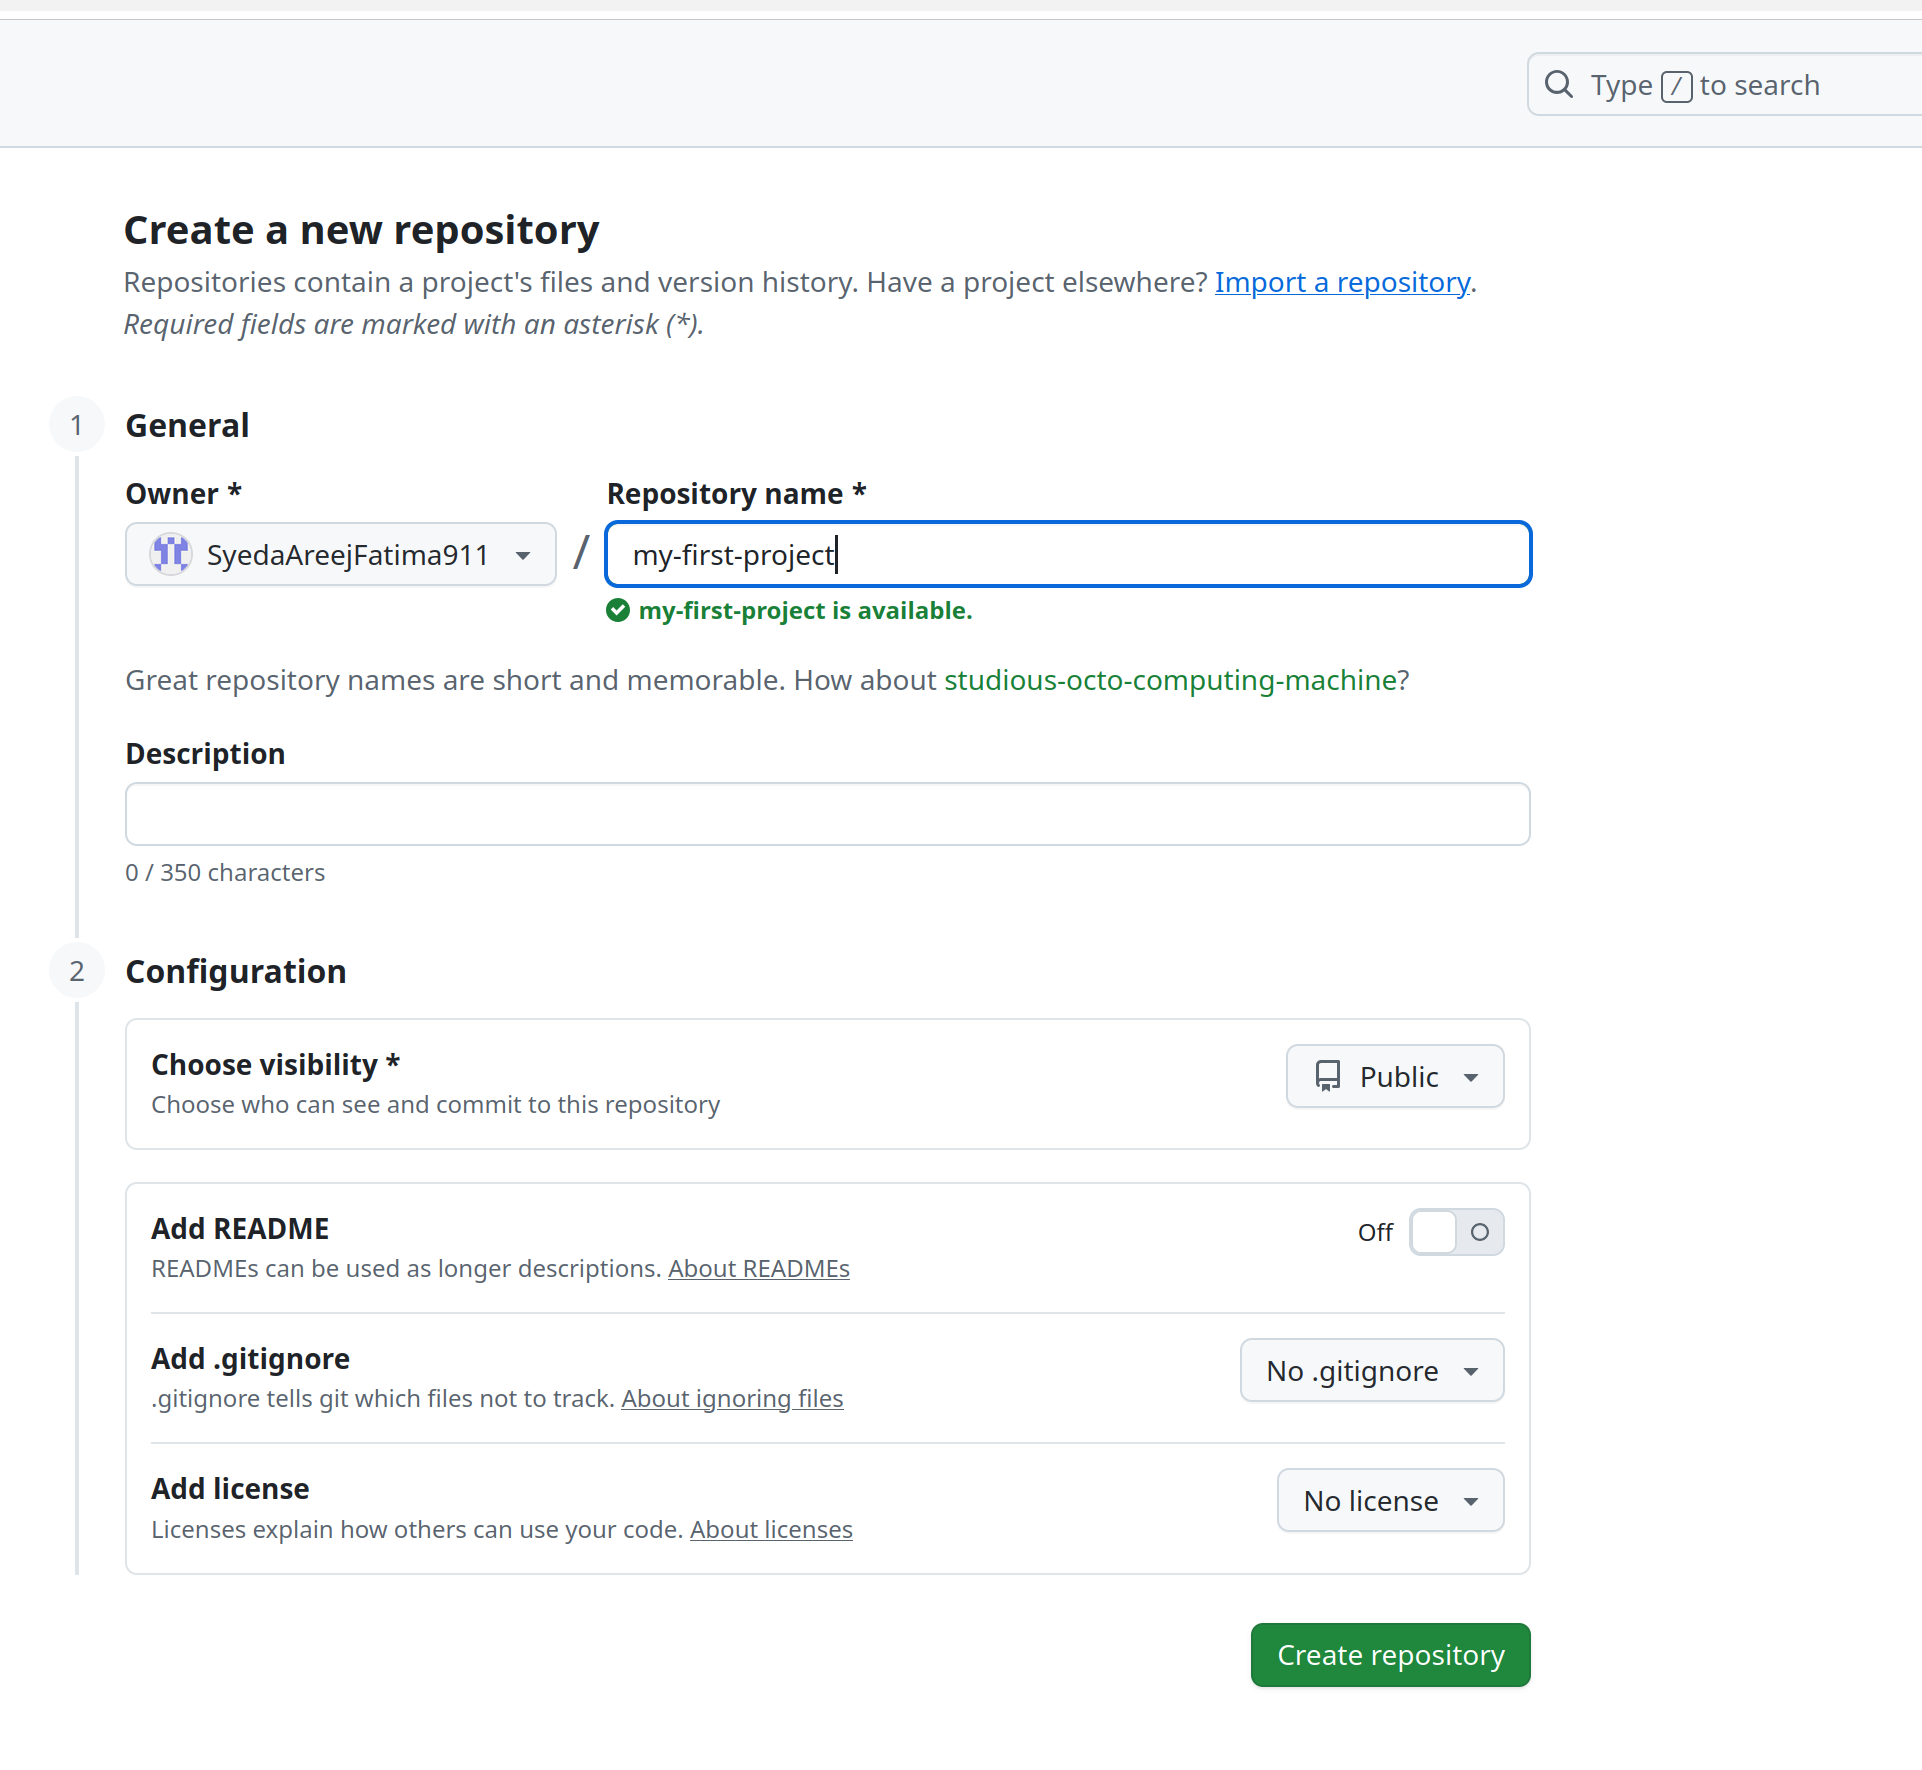
Step 6: Initializing a local repository :#
Navigate into the folder:
Open your terminal and navigate to the folder where you have saved your file (e.g text editor file)
cd folder-nameExample:
git init#
It creates a new git folder that tracks your changes.
git initgit add .#
It tells git which changes we want to include in our next commit. The (.) sign shows add everything the folder.
git add.git commit -m “Initial commit”#
It creates a snapshot of your project so that we can go back to it later. You can add a commit msg with it inside the inverted commas.
git commit -m "Intial commit msg"Output:

Step 7: Pushing to Github:#
git remote add origin#
It creates a version of Repository that is hosted on the internet (e.g like github).
Open your git repository . Click the option Code. There you will see a https link , copy it and paste it in the terminal as given below.
git remote add origin "https link"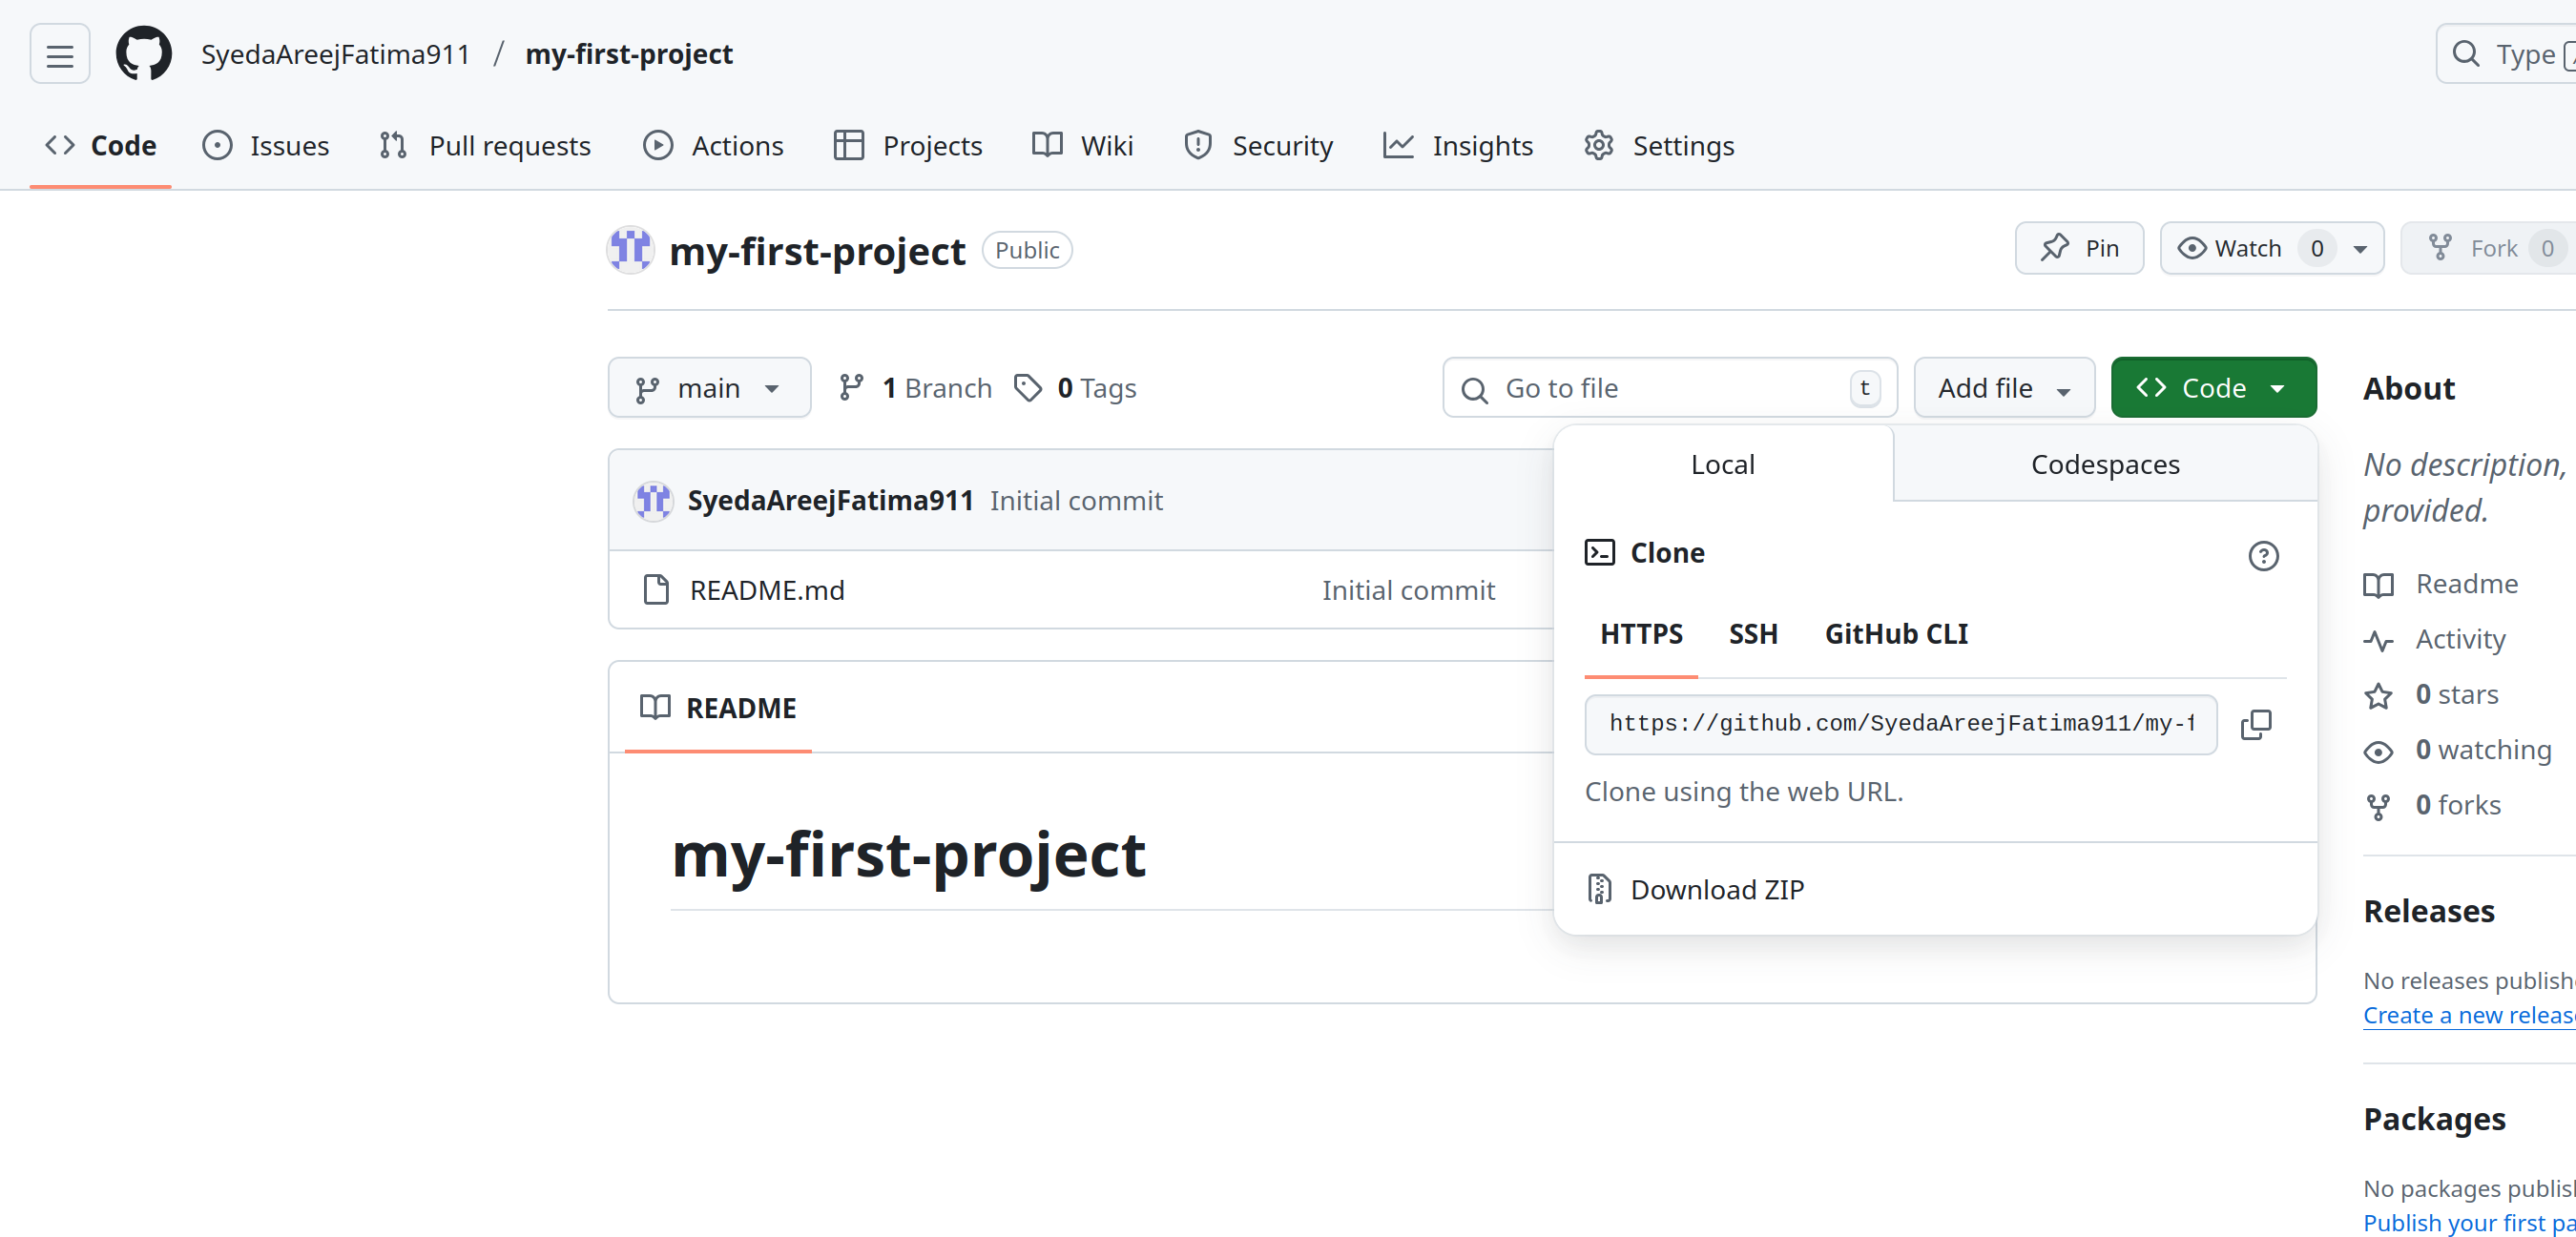
git push -u origin main#
It uploads your local code to GitHub. Here origin is your remote repository and main is your branch.
git push -u origin mainAfter that it asks for the username , so enter your github account’s Username. Then it requires the password. Git doesn’t accept your github password instead you should use a token.
Generate a token key#
Open your github account . On the top right corner click your profile pic —> Open your settings —>Click Developer settings —> Click Personal access tokens.
Over here Select Tokens (classic) And generate a new token.
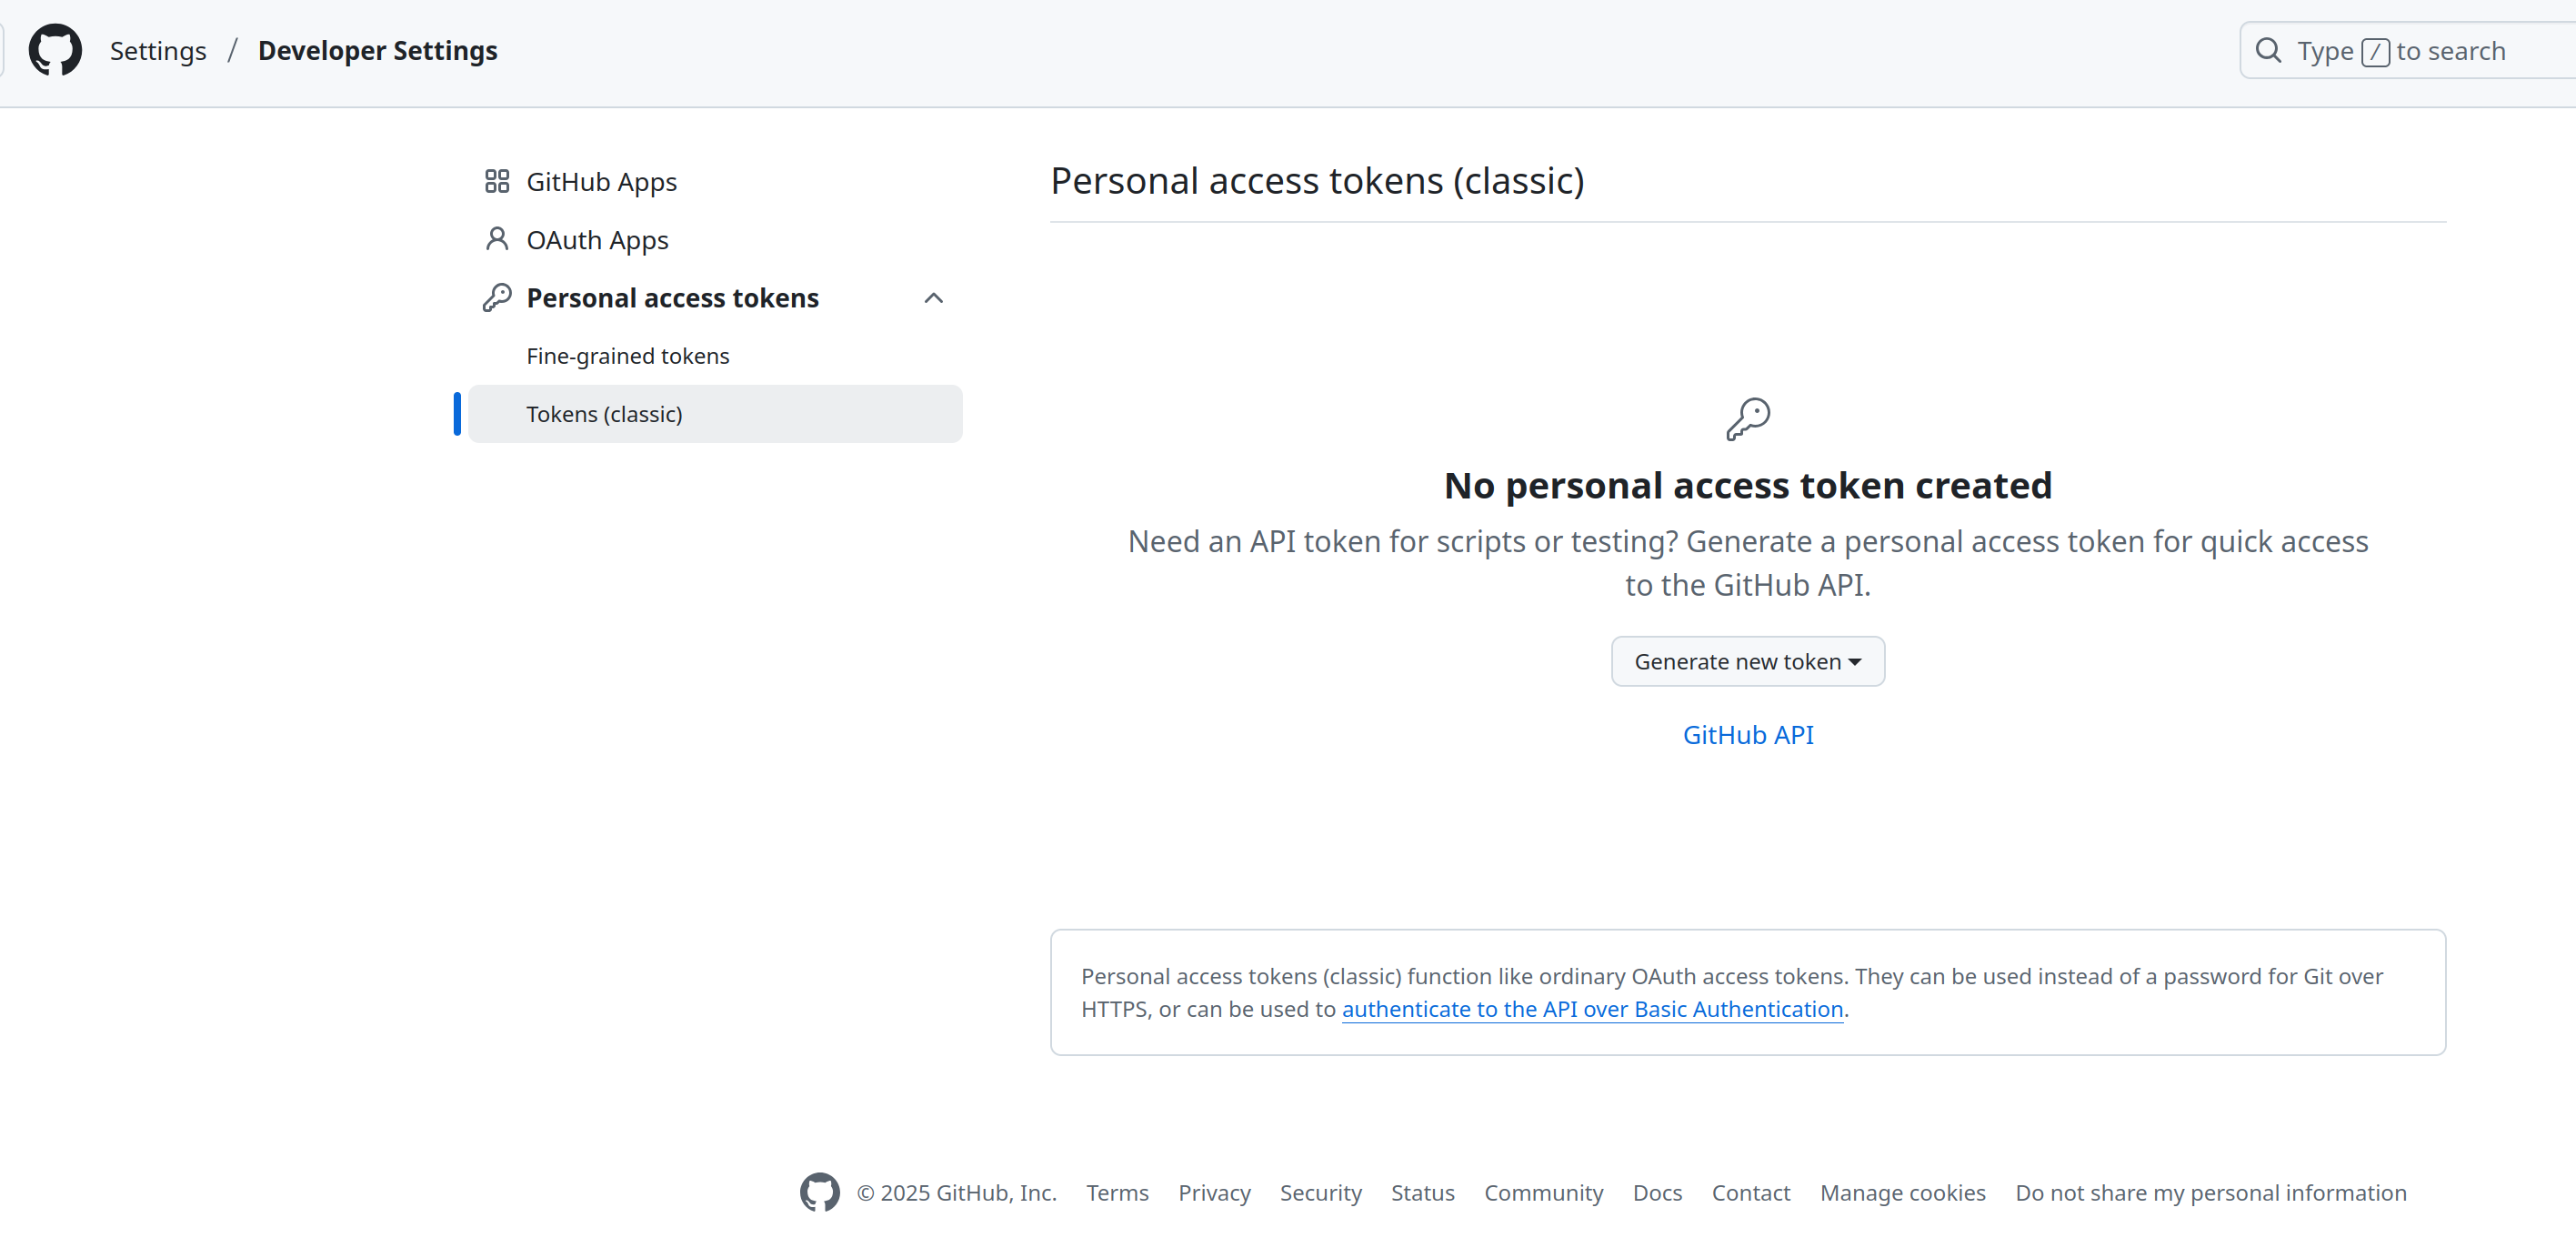
- Then a token will be displayed on your screen copy it and paste it in terminal when it requires the password. Remember when you will paste the token , it won’t be shown on the terminal you just need to click Enter.
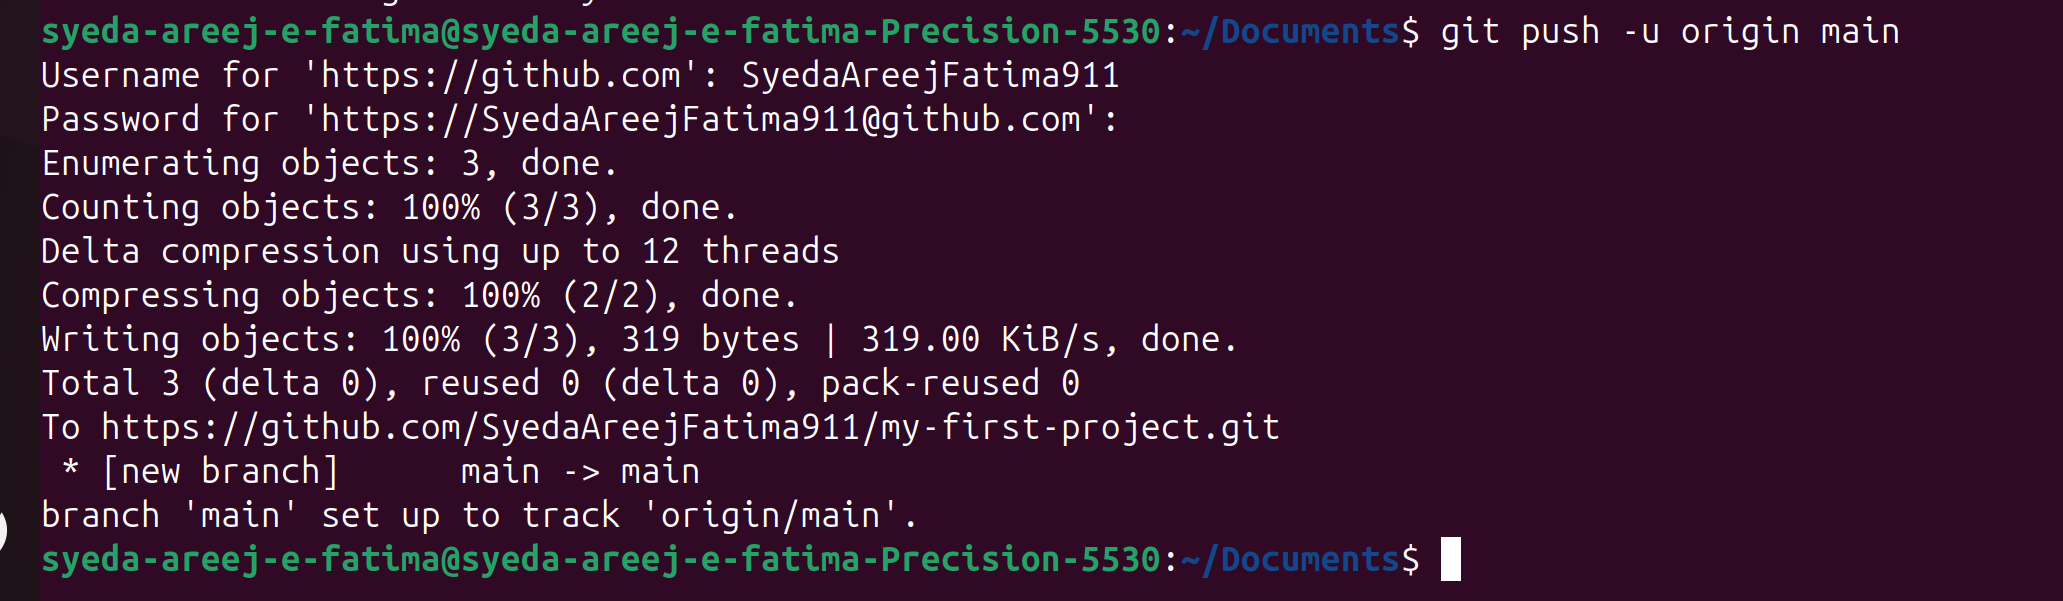
With that, our code is now successfully pushed to GitHub, and our tasks are neatly tracked. Using Git and GitHub together not only helps keep our workflow organized but also ensures that every change is safely version-controlled. This process will become even smoother as you continue practicing. Thanks for reading . happy coding!